Monday 10 December 2012

Beeswax Christmas Decorations

I love beeswax, I love the smell, the feel, the colour, the warmth, just everything about it. So why not include some in my Christmas decorating? Not only is is a truly beautiful, natural product but it's also reasonably priced, very versatile and supports bee keepers - see my modelling beeswax recipe.


Beeswax gets very hot when melted so this is probably one best left to older children and adults.

To make your beeswax Christmas decorations you will first need to prepare some cookie cutters for pouring the wax into, place your cookie cutters onto a heatproof surface (a baking sheet or plate) lined with baking/greaseproof paper. Then using cotton, string or wool make a loop for the decoration to hang from and place with the tied end just under the edge of the cookie cutter so that it will set in the wax.


Next you need to melt your wax, do this by melting in a heatproof bowl over a pan of boiling water or double boiler. I used 30g/1oz of wax to make these 2 small decorations. Once the wax has completely melted, with your fingers, press down the edges of the cookie cutters firmly onto the plate with one hand whilst carefully pouring the wax into the cookie cutter, keep firmly pressing down the cookie cutter for 30 seconds or so, so that a thin layer of wax has set at the bottom preventing the wax from leaking out. Repeat until all of your shapes are filled. You may want to wear rubber gloves to protect your fingers during pouring. Before the wax sets you can add embellishments if you wish, I sprinkled glitter on mine but you could also try something like gems, mirror tiles or beads. The beeswax will set fairly quickly depending on the size of your decoration and temperature, (if your kitchens as cold as mine it only takes 3 minutes. Brrrr!) so when you are confident that they have set push them out and they are ready to hang. I hope that you give these a try and find them as fun and easy as I did.

Saturday 8 December 2012

Salt Dough Christmas Decorations Recipe

Salt Dough decorations are a bit of a staple of childhood aren't they? This was the first time I had made them with Seth and he really enjoyed it all, from measuring and mixing the ingredients at the beginning, through to gifting them and hanging them on the tree at the very end. I'm sure we will be making versions of these all year round.
 

Recipe

1 cup of flour
1/2 cup of salt
1/2 cup of water
1 tsp oil (optional, makes kneading easier)

Measure and pour your ingredients into a bowl, including the oil if you are using. Mix with your hands until it forms a ball and then place it onto the work surface and knead briefly until smooth. If the mixture is sticky knead in more flour, if it is to dry knead in a little water. It should feel similar to play dough.

Salt dough


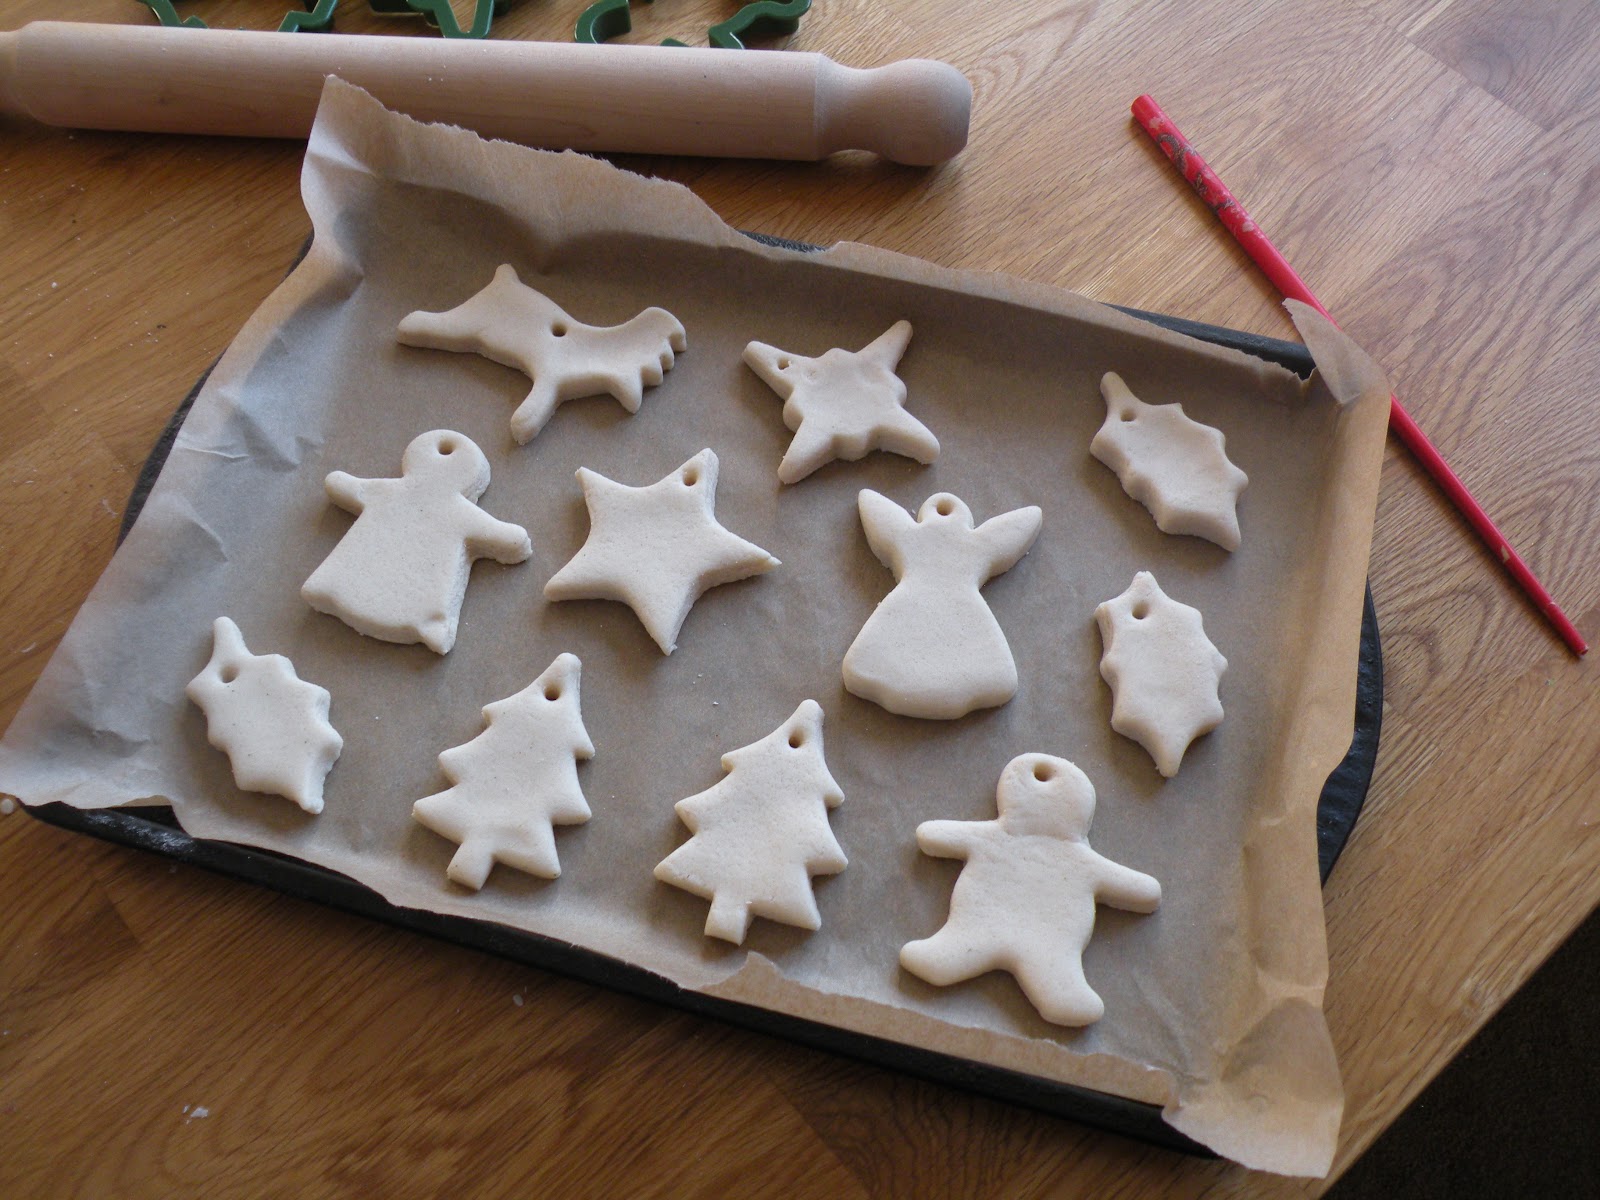
When you are happy with your dough roll it out to 1cm thick. Then using cookie cutters, a knife or anything else that will work, cut out your desired shapes. We used a set of Christmas cookie cutters and made holes to hang them with a chop stick.  


When you have used up all of your dough you will need to prepare them to dry. There are three ways to dry these, which one you choose is up to you (and your child's patience levels!), they all work equally as well.
 
Air Dry. Place on some baking/grease proof paper on a flat surface, like a plate or spare oven tray, somewhere warm and turn over once a day for 48 to 72 hours. This is my preferred method as it uses no electricity.
 
Microwave. Place on some baking/grease proof paper on a plate and pop in the microwave on medium power for 3 mins or so until dry.
 
Oven dry. Place on some baking/grease proof paper on an oven tray and place in a low oven at 100c/200f/gas mark 1/2 for 2 to 3 hours, turning every hour. If they begin to brown turn the temp down slightly and cover with foil.


Now that your decorations are dry and cool, you can hang them as they are or decorate with paint, glitter, sequins, feathers, whatever you can think of!


When they are decorated, thread them with cotton, string or ribbon and they are ready to hang or give as gifts.


Thursday 6 December 2012

Cupcake Case Christmas Snowflakes


An easy way to use up the last few odd cupcake cases left at the end of a pack, squash them flat, fold them up and snip away and your left with pretty patterned snowflakes to decorate with for Christmas. Very simple and quick, and because the paper is so thin it's easier for younger children to cut too.  

Tuesday 4 December 2012

Homemade Modelling Beeswax recipe with Aromatherapy oils

Homemade modelling beeswax snail

We woke this morning to the coldest day yet this year, the garden was bright white with frost as the sun beat down and made it sparkle, feeling the need for something warming and comforting I set about making some modelling beeswax. It's all natural and responds to the warmth of your hands softening to a lovely texture that can be used to make all kinds of things, it makes a lovely change to homemade play dough. I also add essential oils to enhance the sensory experience but it smells just as good with out it.

Ingredients
 
120g/4oz beeswax
1 tablespoon olive oil
1 teaspoon lanolin
12 drops essential oil (optional)


Seth decided that the beeswax blocks looked fun to play with, so I got the rest of my stash out and they made great natural building blocks.

Before you start making your modelling beeswax you need to prepare a container to pour the melted wax into. I used a glass dish measuring 10cm x 20cm lined with baking paper.

Once you have prepared your container put the beeswax, olive oil and lanolin in a heat proof bowl placed on top of a pan of simmering water, heat and stir occasionally until all of the wax has melted, making sure that the pan does not boil dry.

When the wax has melted, carefully, using oven gloves (beeswax gets extremely hot), remove the bowl from the heat and add the essential oils and stir then pour into your prepared container.

Leave to set until firm but still warm then cut with a sharp knife into slices or shapes. If you are giving these as a gift you could smooth and neaten any rough edges whilst warm.


Then play!

This modelling wax will last for as long as you want it to, when left to go completely cold it will set hard, softening again after being warmed in the hand for a few minutes. If it ever becomes dirty or dusty just remelt it and pour it through a very fine sieve or muslin and it's good again. We've had loads of fun playing with this today and hope you will make it and enjoy it as much as we do!

Snail exploring in a beeswax block jungle


Sunday 2 December 2012

Saying goodbye to the TV...


It’s been on my mind for a while now, that huge box in the corner of the room which our furniture, evening and dare I say lives are arranged around. We started well. Seth was 2 and hadn’t watched any TV yet and somewhere, somehow it started creeping in with the odd show whilst I cooked dinner, then we added the occasional film and now a year down the line he’s 3 and the TV, in particular Peppa Pig and her alliteration loving pals, has become a fixture in our daily lives. Some days it’s half an hour sometimes it’s several, how did we get here so fast? It’s not just him either, in the evenings me and Matthew put him to bed come downstairs and plonk ourselves in front of it and become engrossed as all our plans for the evening go out of the window.

It’s not how we want it to be, all the advertising, distraction and persuasion. It’s going. In an effort to simplify our lives and cut our consumption we have decided to get rid of the very thing that represents and promotes the opposite. I won’t lie I’m a little nervous, I have become used to using it as an easy form of entertainment but I’m actually really looking forward to it and who knows after trying to learn how to knit for over a year I may actually be able to make something. 

Wish us luck!